Monday, October 20, 2008
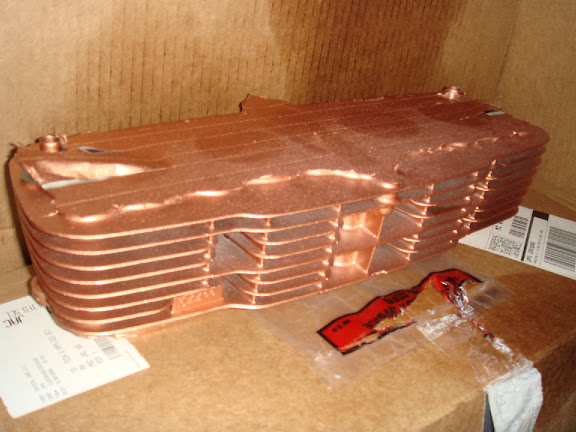
Copper high heat is nice!
Alright, so putting my blast cabinet to use this is what I accomplished. Pictures speak a thousand words, so I'll cut this short.


Wednesday, October 15, 2008
Another update.
A package came. I now have: Exhaust wrap, high heat copper paint, high heat black exhaust wrap coating (paint). The copper and the black are actually the same thing, high heat coating, but they double as high heat paint. Hopefully it holds up.
Going to finish blasting my engine parts.
Going to finish blasting my engine parts.
Update: Works great
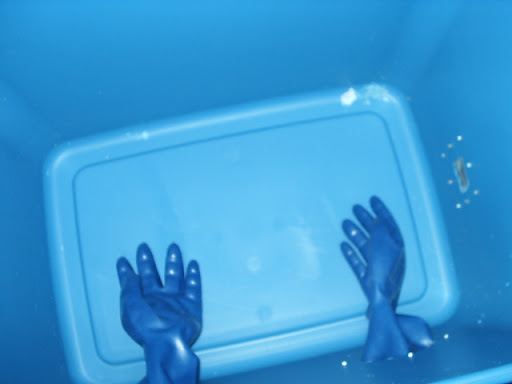
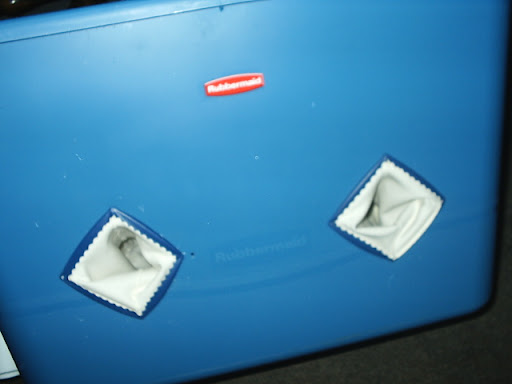
The blast cabinet works great and I only wish I had had the hoses enter between the gloves and positioned the gloves higher up. Aside from those two inconveniences it works how it was supposed to and my engine is mostly cleaned up. A few more odds and ends and I'll be set to paint.
Saturday, October 4, 2008
I prefer to do it myself.
I was trying to figure the best method for cleaning my engine up as the APO (asshole previous owner) painted it that shit black. Not even high heat, flaking off like nobody's business; however, some of it's sticking pretty well. I've shot some aerosol can stripper on it and it took care of a fair amount of it. The problem is on my cylinder heads there are some horribly tight nooks and crannies. The consensus from sohc4.net is to bead blast the bugger. I don't have a blast cabinet, a gun or glass.
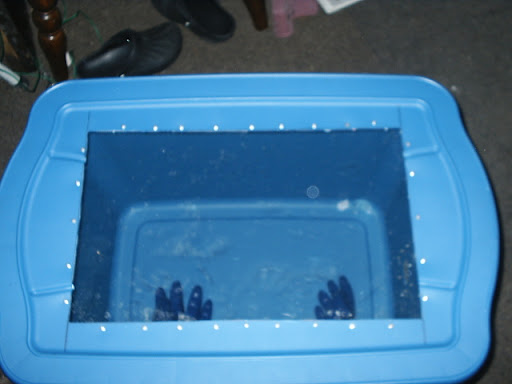
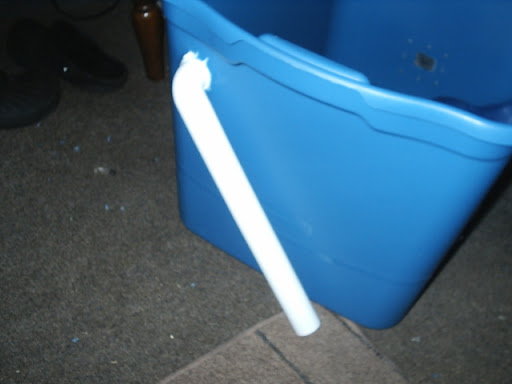
So here was my solution... Blast cabinets run upwards of $150 easy, the guns can be pricey as can glass. For these one time use tools the best source to me is Harbor Freight. I got a gun for $10 and glass for about $25. With shipping it came out to a bit over $40. This still doesn't solve my blast cabinet problem, even the cheapest from HF was about $130. I don't want to be shooting glass beads around without it contained!
Time to solve it.
Rubbermaid tote: $7
Long heavy duty/cloth lined rubber gloves: $7
Length of PVC: $4.50
Polycarbonate sheet: $15
Plus some things I already had lying around: N/A on the price, I'm not counting it.
Total: $33.50
Time: 2 hours (including faffing around time)
Monday, September 29, 2008
Motorcycle updates
Thanks for giving me a cue to do this Mark.
So here are the problems I found since the last update:
My charging system was not working and my battery would die after approximately 5-10 miles from a full charge. My left side engine cover (generator cover) also got very warm when the key was turned on. My field coil was damaged, the resistance was a lot lower than it should have been. Not to mention it was grounding. This explains the hot fuse. Now, let me go into some more detail about this. When I reattached the field coil I used screws that were not stock. I still had the stock screws from a long while ago when I removed it, but they were in rough shape. I removed the field coil again and compared the length of the screws. The new screws were about a millimeter longer than stock. They punched their way through the back of the coil and shredded the thin copper wiring. I cut the screws down to the proper length and replaced the coil. My charging system is now working very well, keeping the battery charged at idle. How did I manage that?
-New rectifier
I used two 25A 400V bridge rectifiers wired together to achieve the same effect as the stock rectifier. These were mounted to an aluminum heat sink cannibalized from a blown PC power supply. These bridge rectifiers cannot be found at Radio Shack and must be ordered online. I will supply the link for anybody interested when I get around to finding the website again.
-New connectors
Rather than cleaning and using the stock wiring clips I opted for bullet connectors. I used dielectric grease to fight corrosion. This may be temporary. I'm looking at redoing my wiring harness with 12g wire, the only connections being soldered. Eliminating clips eliminates fail points in the electrical system as a whole.
-New fuse box
My old fuse box was shot. The PO had put a 30A fuse in place of the stock 15A main fuse. The plastic housing was melted slightly, solder was noticeably damaged from heat and the clips were no longer springy or clean. I could remove fuses by hand. This is a no-no, fuses should be tight requiring a tool to remove them. I replaced it with a fuse box from Radio Shack using the original glass tube style fuses. I am able to run the stock 15A fuse now.
All of the problems I was having with electrical, from my high beam failing to my blinkers not working, routed right back to the damaged field coil. This is a good lesson in sticking to stock screw lengths and double checking.
I couldn't get my bike to rev past 3k rpm. This was really getting to me. I made a very important discoveries along the way to fixing this issue.
The problem was with the carburetors. The PO had put the needle at the second clip. The stock clip position is the third clip. This was my main problem. My other problem was my main jets. These were stock, but I am running pod filters. I upped my jet sizes and have yet to tune for the proper jet size. For now I won't worry about it for one reason:
I have torn my engine apart again. Why? I was having some major leak down and an oil pressure issue. My crankcase was filling with exhaust gases from combustion. Why? Because I'm a moron! I forgot to properly position my rings on reassembly as it was a mock up to be sure the F model gaskets would work with my K model. Well, I should have figured they're exactly the same. The gaskets between models don't change. Anyway, forgetting that I didn't position my piston rings properly was a major mistake. I was getting 120 psi on my compression, but this is unacceptable. It should have been around 140.
Another major problem I had was a loss of oil pressure along with a major oil leak. The o-ring on the oil pump cover was dry rotted to the point of having crack. I'm fairly certain this dropped my oil pressure. It was the obvious source of the leak.
Currently I am working at cosmetics now that I am aware of what is in need of service (not much surprisingly, nearly everything is within spec). I'm painting the tank and I'm taking my time with it to produce a nice gloss. I'll be doing a light coat on the engine in high heat copper and high heat black. Exhausts are shot, I'll be brazing over holes, cleaning up rust, removing the baffles and painting them as well. I don't want to go to a Mac exhaust as I like the stock 4-4 pipes. Eventually I may go to slip ons, but that is an expensive investment - more so than the Mac. I may cave and get a Mac, but I'll be modifying the baffle as they sound tinny.
Also in the future is a front caliper clean up. I've got a new seal and piston to finish this up. Also have fork seals coming. I won't be replacing the dust boots with the stock wiper setup, but rather the earlier model's full fork boots for a more British look. The caliper will also be the high heat copper (to keep uniformity between the copper colors, plus calipers get pretty toasty as well). The fork lowers are going to be painted to hammered black to match my tank.
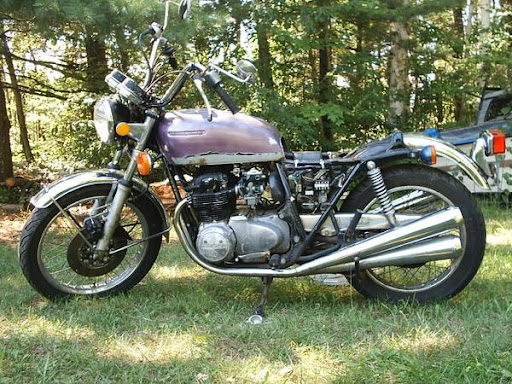
Pictures to come, but just for starters the bike when I brought it home two years ago (I got distracted from this project for a long while, long story that I won't go into):

Wednesday, August 27, 2008
Monday, August 18, 2008
Wednesday, July 23, 2008
Monday, July 21, 2008
More motorbike.
So the starter turns, that's a good sign. Problem is the main fuse gets really hot. I couldn't find any wires that were improperly grounded, but I found a number of wires that were... Weird? The previous owner did something goofy with the wiring; he soldered some together and wonky things like that. Anyway, the high beams don't work, the turn signals don't flash and the brake light doesn't work. The horn doesn't work, but that's because there isn't one ha. I'm sure it all just comes down to dirty and corroded connections in the wiring which won't be too much of a fuss really. I did lose a blade terminal for one of the plugs because the wiring had a hole in the insulation and the wire was rotted/corroded inside; I cut it and took out the terminal for the plug and dropped it (damn). That might be the only issue to be honest because it was a main wire. I'll be picking up some new wiring things at Transistor Hut today.
I have to figure out the clutch adjustment because right now the kick start and the starter motor do not engage the engine with the clutch in. And the electric start doesn't turn unless the clutch is in. Oh my.
I have to figure out the clutch adjustment because right now the kick start and the starter motor do not engage the engine with the clutch in. And the electric start doesn't turn unless the clutch is in. Oh my.
Labels:
motorcycle
Sunday, July 20, 2008
Motorcycle is nearly resurrected
My motorcycle is nearly resurrected. Today I got the engine back into the frame. Tomorrow I'll be bolting it in; at the moment it's only in position which was my goal today.
I have this idea that most humans are probably stronger than they think. My engine probably weighs 3x of what I do. I carried up a set of stairs. I think this goes to show that, regardless of the fact that other apes are much stronger for their body sizes, humans are still pretty fucking strong. We live in such a cushy world with technologies that make things easier and less painful we don't realize it. And come to think of it the motorcycle itself is a good example of that. Transportation. We could all easily make our way on foot across continents, we did it before. Now we've just gotten lazy.
That's silly. I'm not right in the head for now.
PS: I just read the average pair of shoes lasts from 300-600 miles? That's a huge range really... But anyway. It'd take more than one pair of shoes to walk across the states.
Labels:
motorcycle
Saturday, July 19, 2008
Today is career day.
Yet another.
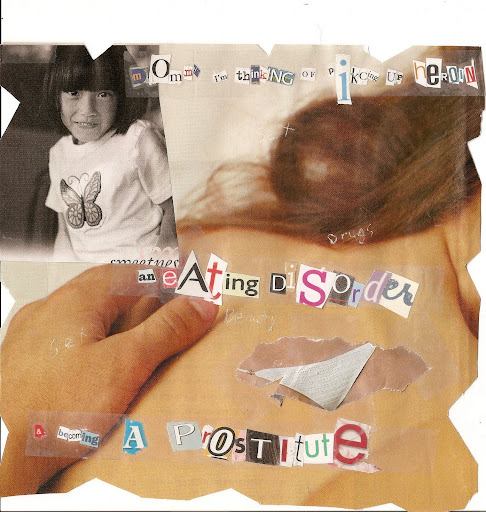
I've decided on what I'm going to do with this blog, I think. I'll continue regularly putting up the collages and if I start seeing a show of interest in them I may eventually set up a proper domain separately for them. Personal thoughts, journals and various blurbs will be regular on here as well.
When things eat at you, eat away.

Eventually there will be a schedule to this, but for now I want to get input and interest people so here's another for your viewing. Again, let me know what you think on here or by other means and if you like the page and such tell a friend.
Friday, July 18, 2008
In The Heat of the Day
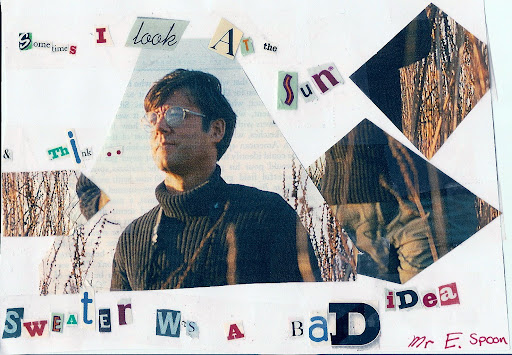
This is experimental 'comic' number one. Comments will be appreciated, criticism and input will be read and considered.
Purpose
I'm still unsure what the purpose of this blog is. I'm considering my options of leaving it as a personal blog/journal thing, but at the same time I would like Mystery Spoon to become something else, something more amusing. I've had an excellent idea (at least I think, and Froglady thinks) for a blog/comic/thing and I'm tempted to give it a go. It's been a while since I've tackled a large project other than my motorcycle, and never since I've tackled an art/expressive/graphic communications thing aimed at the general public. Perhaps it will be a combination of both? We'll see what happens by the end of the week, perhaps Mr. E. Spoon will have a stroke of genius and build something excellent out of Mystery Spoon. Overtime if it is a success maybe I'll make a 'real' domain of it.
Bat Number Two
Bat number two infiltrated my room from the closet last night. It flew around for a while and finally came to rest on my window. I put a pint jar over it and put it out the window.
At least it didn't land on my head.
Labels:
bats
Thursday, July 17, 2008
Motorcycle Progress
I woke up at 9:30 today and put an hour and fifteen into my bike.
I managed to get the rear tire from the 1973 CB550 onto my '77 without there being a huge gap. I used some washers and bearings; the bearings inner diameter was too small so I widened them out and managed to get them over the axle with just the right clearance. It added a total of about 1 cm to the spacer, 2 washers and 2 brass bearings. I hope this doesn't screw up the tracking too much, but from the looks of it the chain side of the wheel is exactly the same it was only the brake side that was different between the models. I'll have to draw some lines and do some measurements to be sure, but for now I'm just happy that I have wheels and brakes on it. I'll be able to get it out of the basement and back into the light of day. In regards to this, I have ordered a brake panel assembly from ebay so eventually I will have the proper hub and rim back on the bike without the need for spacers. The whole idea of that seems mildly unsafe (even though I know it's really not that dangerous) and I'd be more comfortable with the proper hub. For now, this will be good enough. I probably won't switch back to the other rim until I need new tires. The same goes for the front so I don't have to switch the tires from the '73 rims over to my '77 rims. They're just stock tires from 1973 so it's not a big deal, I don't really need them on my good rims.
The other work that was done was the front brake caliper. The original one that was on the bike I managed to crack, damn aluminum casting. I ordered a nused one on ebay but the pistons from both were rusty/pitted. That ended in me buying a new piston and seal. Anyway, I finally got the piston in the mail (it arrived while I was in London) and I put that much back together. I struggled with the brake pad however. I couldn't get it to line up properly because of the guide in the caliper. The pad is recessed into the caliper and it's round with a flat side; on the flat side there is a little round indent for a guide pin. The pin can't be removed from the caliper really and the top of it had a bit of a gouge in it. I think that was the main problem, I sanded it down a bit and used a C-clamp to properly push the pad in. Initially I managed to get it in there severely crooked. I used the piston/brake pressure to push it back out. Thankfully the piston, caliper housing and pad were not damaged. I have front brakes, huzzah! Soon enough I'll have a daily rider.
In regards to the Goldwing which I inheritted from my great uncle - It does not turn over. Something in the wiring is bad or the starter is bad. We'll see, right now this one will remain on the backburner as I want more riding experience before I put his pride and joy in the face of risks.
Labels:
motorcycle
A Change
I've been using livejournal off and on over the years and I'm starting to use google things more and more. It's just easier to have everything in one spot, really. Calendar, email, maps, documents and collaborating with friends and coworkers through gmail is just easy and effective. Anyway, point being I may end up keeping this updated unlike livejournal. Livejournal's layout also tends to get on my nerves quite a bit for whatever reason. Sometimes things are in stupid locations and the way the site is mapped just.. Yeah, I'm not really sure if this will be any better. I don't actively blog as we've all seen so maybe this is just silly to do.
If you would like to access my old blog it is:
Http://www.livejournal.com/~conclusivefault
If you would like to access my old blog it is:
Http://www.livejournal.com/~conclusivefault
Subscribe to:
Comments (Atom)


