http://npmccabe.tripod.com/steam.htm
Once I get a lathe and/or mill... You bet.
Wednesday, January 21, 2009
Monday, October 20, 2008
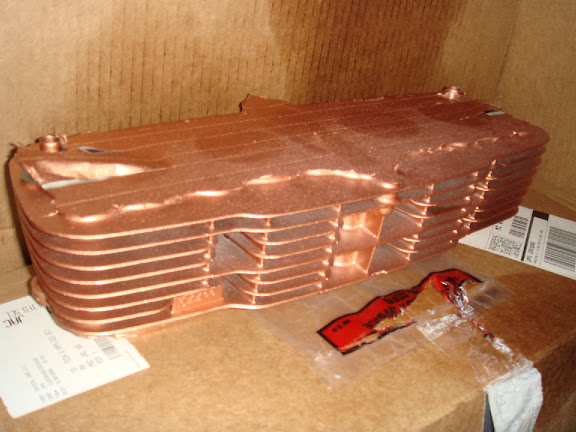
Copper high heat is nice!
Alright, so putting my blast cabinet to use this is what I accomplished. Pictures speak a thousand words, so I'll cut this short.


Wednesday, October 15, 2008
Another update.
A package came. I now have: Exhaust wrap, high heat copper paint, high heat black exhaust wrap coating (paint). The copper and the black are actually the same thing, high heat coating, but they double as high heat paint. Hopefully it holds up.
Going to finish blasting my engine parts.
Going to finish blasting my engine parts.
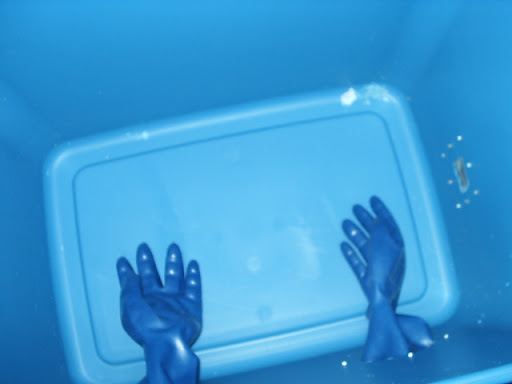
Update: Works great
The blast cabinet works great and I only wish I had had the hoses enter between the gloves and positioned the gloves higher up. Aside from those two inconveniences it works how it was supposed to and my engine is mostly cleaned up. A few more odds and ends and I'll be set to paint.
Saturday, October 4, 2008
I prefer to do it myself.
I was trying to figure the best method for cleaning my engine up as the APO (asshole previous owner) painted it that shit black. Not even high heat, flaking off like nobody's business; however, some of it's sticking pretty well. I've shot some aerosol can stripper on it and it took care of a fair amount of it. The problem is on my cylinder heads there are some horribly tight nooks and crannies. The consensus from sohc4.net is to bead blast the bugger. I don't have a blast cabinet, a gun or glass.
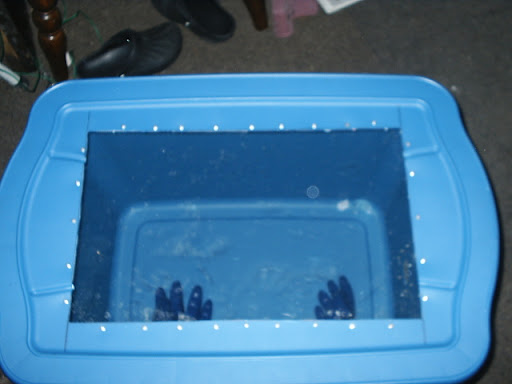
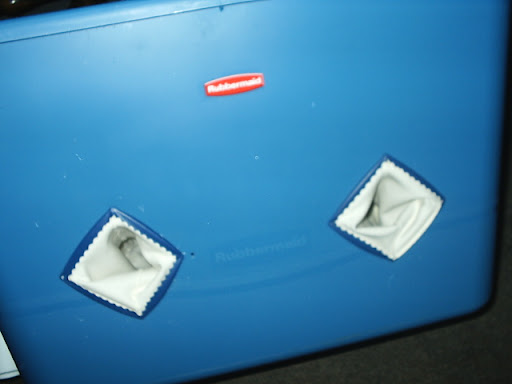
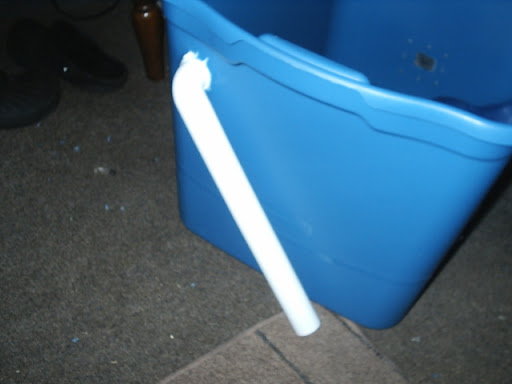
So here was my solution... Blast cabinets run upwards of $150 easy, the guns can be pricey as can glass. For these one time use tools the best source to me is Harbor Freight. I got a gun for $10 and glass for about $25. With shipping it came out to a bit over $40. This still doesn't solve my blast cabinet problem, even the cheapest from HF was about $130. I don't want to be shooting glass beads around without it contained!
Time to solve it.
Rubbermaid tote: $7
Long heavy duty/cloth lined rubber gloves: $7
Length of PVC: $4.50
Polycarbonate sheet: $15
Plus some things I already had lying around: N/A on the price, I'm not counting it.
Total: $33.50
Time: 2 hours (including faffing around time)
Monday, September 29, 2008
Motorcycle updates
Thanks for giving me a cue to do this Mark.
So here are the problems I found since the last update:
My charging system was not working and my battery would die after approximately 5-10 miles from a full charge. My left side engine cover (generator cover) also got very warm when the key was turned on. My field coil was damaged, the resistance was a lot lower than it should have been. Not to mention it was grounding. This explains the hot fuse. Now, let me go into some more detail about this. When I reattached the field coil I used screws that were not stock. I still had the stock screws from a long while ago when I removed it, but they were in rough shape. I removed the field coil again and compared the length of the screws. The new screws were about a millimeter longer than stock. They punched their way through the back of the coil and shredded the thin copper wiring. I cut the screws down to the proper length and replaced the coil. My charging system is now working very well, keeping the battery charged at idle. How did I manage that?
-New rectifier
I used two 25A 400V bridge rectifiers wired together to achieve the same effect as the stock rectifier. These were mounted to an aluminum heat sink cannibalized from a blown PC power supply. These bridge rectifiers cannot be found at Radio Shack and must be ordered online. I will supply the link for anybody interested when I get around to finding the website again.
-New connectors
Rather than cleaning and using the stock wiring clips I opted for bullet connectors. I used dielectric grease to fight corrosion. This may be temporary. I'm looking at redoing my wiring harness with 12g wire, the only connections being soldered. Eliminating clips eliminates fail points in the electrical system as a whole.
-New fuse box
My old fuse box was shot. The PO had put a 30A fuse in place of the stock 15A main fuse. The plastic housing was melted slightly, solder was noticeably damaged from heat and the clips were no longer springy or clean. I could remove fuses by hand. This is a no-no, fuses should be tight requiring a tool to remove them. I replaced it with a fuse box from Radio Shack using the original glass tube style fuses. I am able to run the stock 15A fuse now.
All of the problems I was having with electrical, from my high beam failing to my blinkers not working, routed right back to the damaged field coil. This is a good lesson in sticking to stock screw lengths and double checking.
I couldn't get my bike to rev past 3k rpm. This was really getting to me. I made a very important discoveries along the way to fixing this issue.
The problem was with the carburetors. The PO had put the needle at the second clip. The stock clip position is the third clip. This was my main problem. My other problem was my main jets. These were stock, but I am running pod filters. I upped my jet sizes and have yet to tune for the proper jet size. For now I won't worry about it for one reason:
I have torn my engine apart again. Why? I was having some major leak down and an oil pressure issue. My crankcase was filling with exhaust gases from combustion. Why? Because I'm a moron! I forgot to properly position my rings on reassembly as it was a mock up to be sure the F model gaskets would work with my K model. Well, I should have figured they're exactly the same. The gaskets between models don't change. Anyway, forgetting that I didn't position my piston rings properly was a major mistake. I was getting 120 psi on my compression, but this is unacceptable. It should have been around 140.
Another major problem I had was a loss of oil pressure along with a major oil leak. The o-ring on the oil pump cover was dry rotted to the point of having crack. I'm fairly certain this dropped my oil pressure. It was the obvious source of the leak.
Currently I am working at cosmetics now that I am aware of what is in need of service (not much surprisingly, nearly everything is within spec). I'm painting the tank and I'm taking my time with it to produce a nice gloss. I'll be doing a light coat on the engine in high heat copper and high heat black. Exhausts are shot, I'll be brazing over holes, cleaning up rust, removing the baffles and painting them as well. I don't want to go to a Mac exhaust as I like the stock 4-4 pipes. Eventually I may go to slip ons, but that is an expensive investment - more so than the Mac. I may cave and get a Mac, but I'll be modifying the baffle as they sound tinny.
Also in the future is a front caliper clean up. I've got a new seal and piston to finish this up. Also have fork seals coming. I won't be replacing the dust boots with the stock wiper setup, but rather the earlier model's full fork boots for a more British look. The caliper will also be the high heat copper (to keep uniformity between the copper colors, plus calipers get pretty toasty as well). The fork lowers are going to be painted to hammered black to match my tank.
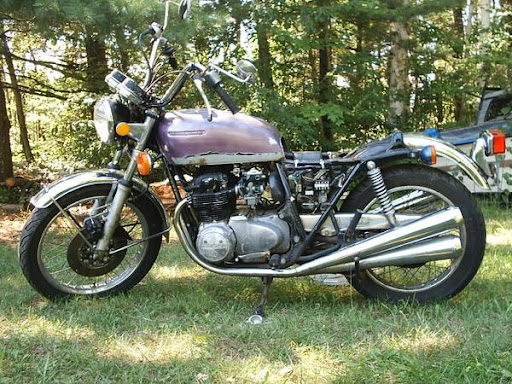
Pictures to come, but just for starters the bike when I brought it home two years ago (I got distracted from this project for a long while, long story that I won't go into):
So here are the problems I found since the last update:
My charging system was not working and my battery would die after approximately 5-10 miles from a full charge. My left side engine cover (generator cover) also got very warm when the key was turned on. My field coil was damaged, the resistance was a lot lower than it should have been. Not to mention it was grounding. This explains the hot fuse. Now, let me go into some more detail about this. When I reattached the field coil I used screws that were not stock. I still had the stock screws from a long while ago when I removed it, but they were in rough shape. I removed the field coil again and compared the length of the screws. The new screws were about a millimeter longer than stock. They punched their way through the back of the coil and shredded the thin copper wiring. I cut the screws down to the proper length and replaced the coil. My charging system is now working very well, keeping the battery charged at idle. How did I manage that?
-New rectifier
I used two 25A 400V bridge rectifiers wired together to achieve the same effect as the stock rectifier. These were mounted to an aluminum heat sink cannibalized from a blown PC power supply. These bridge rectifiers cannot be found at Radio Shack and must be ordered online. I will supply the link for anybody interested when I get around to finding the website again.
-New connectors
Rather than cleaning and using the stock wiring clips I opted for bullet connectors. I used dielectric grease to fight corrosion. This may be temporary. I'm looking at redoing my wiring harness with 12g wire, the only connections being soldered. Eliminating clips eliminates fail points in the electrical system as a whole.
-New fuse box
My old fuse box was shot. The PO had put a 30A fuse in place of the stock 15A main fuse. The plastic housing was melted slightly, solder was noticeably damaged from heat and the clips were no longer springy or clean. I could remove fuses by hand. This is a no-no, fuses should be tight requiring a tool to remove them. I replaced it with a fuse box from Radio Shack using the original glass tube style fuses. I am able to run the stock 15A fuse now.
All of the problems I was having with electrical, from my high beam failing to my blinkers not working, routed right back to the damaged field coil. This is a good lesson in sticking to stock screw lengths and double checking.
I couldn't get my bike to rev past 3k rpm. This was really getting to me. I made a very important discoveries along the way to fixing this issue.
The problem was with the carburetors. The PO had put the needle at the second clip. The stock clip position is the third clip. This was my main problem. My other problem was my main jets. These were stock, but I am running pod filters. I upped my jet sizes and have yet to tune for the proper jet size. For now I won't worry about it for one reason:
I have torn my engine apart again. Why? I was having some major leak down and an oil pressure issue. My crankcase was filling with exhaust gases from combustion. Why? Because I'm a moron! I forgot to properly position my rings on reassembly as it was a mock up to be sure the F model gaskets would work with my K model. Well, I should have figured they're exactly the same. The gaskets between models don't change. Anyway, forgetting that I didn't position my piston rings properly was a major mistake. I was getting 120 psi on my compression, but this is unacceptable. It should have been around 140.
Another major problem I had was a loss of oil pressure along with a major oil leak. The o-ring on the oil pump cover was dry rotted to the point of having crack. I'm fairly certain this dropped my oil pressure. It was the obvious source of the leak.
Currently I am working at cosmetics now that I am aware of what is in need of service (not much surprisingly, nearly everything is within spec). I'm painting the tank and I'm taking my time with it to produce a nice gloss. I'll be doing a light coat on the engine in high heat copper and high heat black. Exhausts are shot, I'll be brazing over holes, cleaning up rust, removing the baffles and painting them as well. I don't want to go to a Mac exhaust as I like the stock 4-4 pipes. Eventually I may go to slip ons, but that is an expensive investment - more so than the Mac. I may cave and get a Mac, but I'll be modifying the baffle as they sound tinny.
Also in the future is a front caliper clean up. I've got a new seal and piston to finish this up. Also have fork seals coming. I won't be replacing the dust boots with the stock wiper setup, but rather the earlier model's full fork boots for a more British look. The caliper will also be the high heat copper (to keep uniformity between the copper colors, plus calipers get pretty toasty as well). The fork lowers are going to be painted to hammered black to match my tank.
Pictures to come, but just for starters the bike when I brought it home two years ago (I got distracted from this project for a long while, long story that I won't go into):
Wednesday, August 27, 2008

Subscribe to:
Posts (Atom)

